Just found this: an excellent conversion of a Peugeot Expert into a campervan.
Very exemplary!
Mr. Percy's Adventures
This blog describes the campervan "Mr.Percy", a 1999 Peugeot Expert. This is my very first campervan.
Thursday 17 October 2013
Friday 11 January 2013
Ferry Dunkirk-Dover
After that unfortunate start in the morning, the rest of the journey went smooth. Continuously driving on the Autobahn, passing Cologne (Koeln), then towards Brussels, then Dunkirk (Dunkerque). The DFDS ferry from Dunkirk to Dover was £20 cheaper than from Calais, and also one gets to be longer on the ship. And for me, the drive to Dunkirk is a bit shorter than further on to Calais.
Everything went well. Again one hour sleeping in one of the chairs of the ferry. Then the remainder of 5 hours on the road on motorways in the UK. I arrived "at home" around 01:00.
MrPercy is stuck!
After a few days in Italy, first skiing in the Dolomites, then sightseeing in Venezia, MrPercy returns back to Germany. A few days rest, visiting Wuerzburg, family and friends. Then, on Friday morning, just before the long journey back, a small incident happened.
When rolling backwards out of a hilly driveway, I missed a slight left turn of the downhill winding path and headed straight. I almost did not see anything on that non-illuminated way, but I had assumed that I would just stay close to the fence and slowly roll down following that path. But when the way turned left, I did not realise this, in the darkness of the early morning. And so I headed straight into a few trees. Very slowly, I heard a scratching, but thought that would be the tree branches on the roof. When I tried to back out forward, MrPercy did not move: the front left wheel dug itself into the soft mud, and even with some rough material there, the car was not able to pull itself out forward up that quite steep hill. The clutch even began so smell burnt, so I stopped all maneuvers - and called for help.
With the help of a tractor from friendly neighbors, MrPercy was pushed upwards out of the stuck-situation and then could continue to roll down as originally intended. In the process, unfortunately MrPercy received a dent in the left back door, when the tractor slipped off MrPercy's bumper. But at least I was able to begin my return journey and catch the ferry in Dunkirk.
Tuesday 1 January 2013
In Venezia
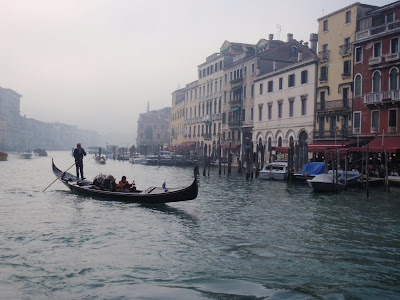
The next few days were spent in Venezia (Venice). Parking in the Tronchetto parking structure.
Of course, MrPercy was not able to go onto the Canale Grande and enjoy the real sights of Venezia.
Monday 31 December 2012
Celebrating the Beginning of the New Year 2013
For the holidays I had attached a solar-powered Christmas illumination, here seen as it was lighting up during my stay in Iphofen before travelling to the mountains. But the same illumination came very handy to celebrate the New Year as well.
Friday 28 December 2012
Driving in Snow
Over night some fresh snow had fallen. MrPercy is snowed in. But then, after dug out, the car drove nicely on the snow-covered roads.
Good that there is a lot of space inside MrPercy, for skis and ski boots.
Thursday 27 December 2012
Into the Mountains
After the Christmas celebrations, MrPercy is heading South. First across the Fernpass, trough Austria, bypassing Insbruck, then on the Brennerautobahn into Northern Italy. Traffic is moderate, it is not really one of the major travel days. Leaving the Autostrada near Vipiteno/Sterzing, towards East into the Pustertal, then turning South from Bruneck. Up to the Passo Valparola, 2168 m high, then further to Passo Falzarego. Not sure if MrPercy has ever been out of the UK. If not, then this would be the highest elevation that this car has been.
At the hotel.
At the hotel.
Sunday 23 December 2012
Driving in Europe
One of the first things after disembarkation in Calais is to stop at a parking spot and affix the light deflectors. This needs to be done because of the vehicle headlights are asymmetrical: when driving on the left side in UK, they shine to the side instead of the ongoing traffic. This now would create problems when driving on the right - and the lights would blind oncoming traffic. Therefore, deflectors need to be mounted to correct this and deflect the light more to the right side. These can be bought for example at Halfords.
The instructions do not show the specific pattern of MrPercy's headlights. so I need to follow the general instructions and find the base line. I hope that this is correct what I have identified...
On the motorway, MrPercy enjoys finally driving with speeds of more than 70 mph. I do not have a rpm meter, so I drive the engine with care. Even though in 5th gear, when above 70 mph, the engine appears to run at quite high rpm. And that is not very good for Diesel engines. So I kept the speed lower, but above the 70 mph mark. At one point I reached briefly a speed of 140 km/h, around 85 mph. Quite ok for old MrPercy and his 120k+ miles engine.
Shortly after midnight I reached my destination: my hometown Iphofen.
On the Ferry Dover-Calais
The DFDS ferry leaves on time at 12:00 noon. DFDS had cheaper prices than P&O, so I had booked with them.
The drive through the UK went well. Motorways were clear, no problems on the M1.
The ferry was quite empty. I used the time to sit in one of the empty chairs and tank an hour of sleep.
The drive through the UK went well. Motorways were clear, no problems on the M1.
The ferry was quite empty. I used the time to sit in one of the empty chairs and tank an hour of sleep.
The Big Trip Begins
The day before the big travel, my brother from Germany asked if I could pick up a wooden bookcase for him. I think briefly: there may not be enough time to catch the ferry... I call the seller and arrange a time with him to pick up the book case. So I drive on Saturday evening, through a rainy motorway, about 1 1/2 hours to collect the book case.
Then the packing begins.
Not much sleep. I have to get up early. Pack everything in MrPercy, around the book case with its delicate class doors. But everything is stable, should survive the trip well.
At 5:30am I leave.
Saturday 22 December 2012
Installing a Rear Lap Belt
It is the last day before the "big trip". Currently MrPercy is only equipped to "host" two people, there are only two seats in the front. But what if I want to take someone else, just for a short drive, not for staying? There is the bench in the back. But it does not have any seat belt. I start looking and find belts at Halfords. Saturday morning I go there and get one lap belt.
In MrPercy I find several of the original mounting screw holes of the rear seatbelts, in the vehicle side wall. These are the points where a seat belt must be mounted in order to be safe. Unfortunately I only find the one at the wall, but not anything on the floor for the central mount. So I have to attach the other part of the belt on the wooden frame. I am aware that this is not really safe, as in the case of a collision the seat belt mounting would not be strong enough to withstand the forces. But the other half of the seat belt I attach to the "official" wall mount. Is better than nothing. At least during a sudden breaking maneuver, whoever sits there will be fixed to the seat instead of flying through the space.
Friday 21 December 2012
Some Inside Additions
The "wardrobe" walls slowly get filled with switches. I placed the heater control unit there, as this would be nicely in the center of the vehicle. I also added a net for transporting some things.
Next I will think of how I can install at least one additional seat belt onto the rear bench.
We Have Heating!
After thinking for a while, I decided to get a blown air heating system installed. It is winter, and I am planning to take Mt.Percy for a longer ride into wintery regions. When repairing some of the things during the cold evenings in recent weeks, I wished that I had a heater installed.
For a while I looked on eBay: Propex gas heaters appear to be very popular. But in recent weeks the prices for used heaters shot up significantly. People were obviously willing to pay more than £ 300 for an old beat-up used system. I decided then instead to get a new heater, which is available for £ 429 at Rainbow Conversions. Interesting enough: their outlet on eBay as grasshopperleisure sells exactly the same thing for £ 499. Indicates a good reason also to look for other shopping sites than eBay, as prices are not always the cheapest there.
Maybe I could have installed this heater myself, but I was wary of drilling holes into the floor of MrPercy, not knowing if I might damage something. So I began considering letting a professional installer setting up the heater. In the meantime, after some research, I realised that the gas bottle I had was Butane. And this gas is unsuitable to be used below 0deg, as it does not produce any gas at this temperature and below. So I would have to get a propane gas cylinder. But then I discovered the Gaslow system: this actually is a refillable gas bottle, which uses standard LPG, which is available on many petrol stations across Europe. I got a quote from a local motorhome dealer, and then decided to spend the money and get this installed. The Gaslow cylinder is yellow. A metal hose goes to a filling terminal, so that the gas can be filled from the outside.
I installed the electrics of the heater myself, because the heater will of course be controlled through the fused panel switch. I mounted the control unit which came with the heater, near the switch board. Small problem there first: the switch appeared to be larger than its hole in the cover. This seemed to prevent that the cover could be removed from the back plate. Eventually, however, it worked, and I was able to connect all the cables properly.
So now MrPercy has a fully functional heater. I tried it out, and it works great! Ready now for the big upcoming trip.
Monday 10 December 2012
More Small Repairs
The rear "wardrobe" door had a broken hinge. I replaced it with a new one.
I noticed that the front left turn signal indicator housing had water in it. So I removed that glass housing and drained the water out.
Also, the whole left front light assembly felt as if it could be moved easily. When I looked closer, I saw that there is a crack in the rear of the plastic housing, right next to one of the screws. I bent it slightly so that the cracked parts snapped back into the proper shape, then I put a piece of duck tape over it.
When making tight turns to the right, I had noticed that the left front wheel did touch something inside the wing. I had a closer look and noticed that the inside wing plastic cover was broken and apparently bent out of shape. I removed it, then re-attached it, slightly at a different position than before, further to the front so it would not touch the wheel anymore.
Safety First!
For a while I had these lying around in MrPercy, but today I finally fixed them at the wall where they belong: a CO detector and a smoke detector. Also I closed all of the openings that I had found in the rear doors: I felt that exhaust fumes would come into the car when standing idling for example at a traffic light. And I think they came in through those holed for which I do not really have any use. For venting I plan to put one of those roof vents in, directly above the cooker.
Sunday 9 December 2012
Driving in Winter
Yesterday was the first drive on wintery roads. There is snow up in the UK Pennines, and on some side roads there is also an ice cover. The all-season-tyres od Mr.Percy did well, although on plain melting ice uphill they did not have any chance. But on the ice parking lot they had a good grip.
The Gas Cooker is Working!
Yesterday evening for the very first time I fired up the gas hob. I first checked that the gas hose was connected tightly. The gas bottle was now affixed properly, the electric 12V wire was properly connected. I opened the valve at the gas bottle. No noise or anything that would indicate that gas would flow. I then went into the van and turned one of the knows at the hob to let the gas flow. Then I used an igniter to get a flame and light the gas. And it worked! Did the same for the other ring of the hob, and then I had both cookers working properly.
Today then came the real test: boiling some tea for our group as we went out on a photo and video shoot. As the picture here documents, the hob worked well, and 6 people had their cuppa.
Saturday 8 December 2012
More Fixing of Things
Since I had begun to investigate the 12V circuits, I have always been bothered by that electric connection of the water pump to the 12V from the main car battery. First, it should be connected to the leisure battery, so as not to drain the car battery. And then, the connection of all those cables is on the vehicle floor, not far from the gas bottle. In my view an unacceptable hazard. So I removed this part of the wiring and replaced the +12V line from the car battery with that thick red cable that I had bought. I figured out how to route it through the cupboard into the wardrobe, where all the 12V electrics now comes together. Now, after I replaced this, a clean properly colored red cable makes the connection between the car battery and the leisure battery. I removed the -12V wiring that was attached to the vehicle halfway to the back, and also removed the pump wiring which had simply be connected to this. The pump will get its own fuse-protected circuit.
I also fixed the gas cylinder with brackets at the wall. Before it had just been standing, subject to any movement and not attached to anything. Another hazard is that this gas bottle compartment is not sealed - there is a gap between the board which constitute the side towards the passenger / living area. I will have to seal this, to keep gas away from there. Also, the compartment does not have a floor vent, which is necessary for safety, in case gas leaks out. This will have to be fixed too, but I am a bit hesitant to drill holes into the vehicle floor...
Another thing that had bothered me was that the rear lights had two white reversing lights, but only the right one was working. I decided to fix this and opened the left rear lamp case. I was surprised to see that only blinker and rear / brake light bulbs were fitted, but two other slots for reversing light and fog light were empty. In fact, the light assembly had not even provided any space for these bulbs, which means that they never had been fitted! I decided to change this, and I drilled away the plastic part which prevented these two bulbs to be fitted. Then I inserted the "582W bulbs which I recently had bought, into the assembly. Tested it, and now I do have fully symmetrical rear lighting. Not sure why these bulbs never had been fitted - maybe there is a UK regulation that only requires one single reversing light and one single fog rear light?
Sunday 2 December 2012
The Electrics
This weekend I took care of the 12V electrics. The leisure battery had been connected to the items (water pump, light, 12V socket) directly without any fuse. The only fuse (15A) was in the line from the car battery to the leisure battery. Furthermore, the TEC3M relay had been completely incorrect wired, resulting in both batteries constantly being connected. I wanted to fix that all.
First I wanted to use one single thick wire from the car battery to the relay in the back of the car. However, I did not find a way of getting this cable through the fire wall between the engine and the passenger compartment. It appeared very difficult, and I would have to remove all kinds of paneling on the dashboard. I did not want to do this, so reluctantly I left that part of the previous cable wiring intact. I only rewired the line in the motor compartment, where for reason of supporting a higher current two parallel wires had been used. However, these were again merged into one single cable, with the same thickness. So completely pointless. Also, the cable was attached to the +12V terminal of the car battery just with a small temporary clamp. I did remove this and used a proper permanent connector, to ensure a good contact.
I did leave the remaining cabling from the car engine compartment to the rear intact, although the cable for the +12V had been black, when it should have been red.
In the rear, I removed the very heavy leisure battery from the compartment under the wardrobe and placed it in the new battery box. Connected thick cables to both terminals. There was another small issue: the external 240V input lead did have an earth connection, and that was attached to the vehicle body with a screw. I thought I would use this also as the point to connect the leisure battery mass -12V. But then I did notice that this screw was not connected at all to the vehicle metal body, but just to the plastic. Which means, it did not at all fulfill its protective role of the 240V circuit! I really would like to have a word with that person who did the wiring of all these electrics! I found a better location and grounded there the mass and the earth conductor.
Then I affixed the newly purchased 50A switchable fuse as the first item in the +12V leisure line. This will serve as the main switch to disconnect any of the electricity consumers from the batteries.
Then came a more difficult problem: cutting holes into the wardrobe wood boards for mounting switch panels. I have an electric saw, but it is very unwieldy in that very small space. So first I drilled a few holes, then I used these holes as starting points to cut further the opening, until that switch panel fit.
This panel is a series of 8 independently fused circuits, from 4A to 10A. I connected these after the main 50A fuse. Then I made the first connection by activating the available 12V socket. Works great. I chose to use for this socket the strongest fuse with 10A, to be flexible for strong external electricity consumers. Furthermore, I connected a 300W voltage converter with 240V output. Due to the potentially large currents, I connected this directly after the 50A fuse. It is not switched on by the wall panel, but by its own switch in the back.
Then I was ready to correct the wiring of the TEC3M. But then I did mistake an adjustment screw for an actual fixation screw, which I thought would be used to fix the relay onto that board. However, this was just a small potentiometer to set the voltage point when the relay should kick in. And by turning it I ruined it... and the TEC3M did now switch on always. Would be no difference to how it had been before, except that the relay now was on and could potentially empty the car battery. So I ordered another relay, this time a Durite 140A switch relay which would do the same purpose.
Saturday 1 December 2012
Fixing the Gas Bottle
When I bought the car, the blue gas container just stood there in its compartment, without any attachment to the walls. I bought a strap for attaching the gas bottle to the wall, so that it would not fly around wildy. I have not yet tried the gas cooker - hopefully it will not explode when I ignite it for the first time. I am not very comfortable with gas - one of my childhood memories is that someone in our village got badly hurt in a house gas explosion. And I keep reading about exploding gas equipment... it appears to be inherently unsafe. But for a campervan I have no other choice for cooking and heating - gas is the only option, when driving into the wilderness and not having any external electric power available.
Friday 30 November 2012
All-Weather-Tyres - just in Time
Two weeks ago I had decided that it would be a good idea to get all-year-tyres for MrPercy. I am planning to take the vehicle to areas where there might be snow and ice. The tyres which were now mounted were still ok, but would eventually need to be replaced. So I went once again to MyTyres and ordered online 4 new tyres. For this particular size there were only 4 brands to choose from. And only one had reasonable review results, so I chose the Vredestein Quatrac 3. Unfortunately not very cheap... but I hope this tyre will proof itself worth the expense.
Interesting: the tyres ordered through MyTyres are shipped from Germany, as in the UK it is basically almost impossible to get a choice of winter or all-season tyres. The shipping is included in the price, they ship the set of 4 tyres to a garage of my choice, which then do the fitting at a special fixed price (£ 15 per tyre).
Thursday 29 November 2012
Window Isolation
From B&Q I had bought a roll of metal foil insulating bubble wrap. This is used for thermal insulation in buildings, but I want to make window shades from it, for overnight stays and for blocking the windows. I started with the driver-side rear back door window. Also I had already fixed the isolation of the wardrobe which meant that part of that right rear side window would always be covered.
Wednesday 28 November 2012
Trouble with China
In recent weeks I had bought many items on eBay, and many of them were available by sellers in Hongkong, Taiwan, Singapore, and China. Their prices are just without competition - even with the shipping the items are so much cheaper than anywhere in the UK. So far almost everything arrived ok, with sometimes very fast, sometimes a bit slower delivery. But then I hit two "rotten apples": I got sent two completely wrong items. Instead of a CCTV recorder, I got an automatic fish pond feeder. And instead of 5 cameras, I only got 5 little miniature camera stands. Maybe it is the nature of the objects that I have ordered - could it be that cameras and video equipment are somewhat suspect? All sellers on eBay display their customers satisfaction rates. Most are 100%, or maybe 99.8%. The ones that did those "mistakes" sending me wrong stuff had an approval rating of "only" 98.5%. I had thought that this was not much of an issue... but apparently it is. They promised now to send me the correct items. Let's see.
Tuesday 27 November 2012
Battery Box
In order to "seal" the battery box, I bought a thick rubber seal which I then placed around the edges. When the rear doors are closed, there is still a gap between the seal and the doors which I plan to close with some additional foam. This will not be really tightly sealed... but will be much better than the compartment where the battery had been before: under the wooden wardrobe.
Subscribe to:
Posts (Atom)